Deploying Jenkins in a Kubernetes Environment
1. Install and Deploy Jenkins
1. Manual Installation
Manual installation is straightforward—just prepare the YAML configuration in advance. The complete CICD resource file jenkins-install.yaml is as follows:
|
|
Apply the Jenkins installation:
|
|
This installation involves the following resources:
- Local storage: using
hostPath - RBAC permissions:
ServiceAccount,ClusterRole,ClusterRoleBinding - Deployment and services:
Deployment,Service,Ingress
2. Configure Jenkins
Note: Since Jenkins performs signature verification on update-center.json, you must disable this check beforehand to avoid failures when changing plugin sources. Set the environment variable JAVA_OPTS=-Dhudson.model.DownloadService.noSignatureCheck=true.
After installing Jenkins, open https://jenkins.test.com and enter the admin password. Retrieve it via:
Skip plugin installation initially. Choosing default plugins will be very slow (you may opt for recommended plugins instead). Click the close button in the top-right corner to skip plugin selection. After configuring the domestic mirror source, proceed with installing essential plugins.
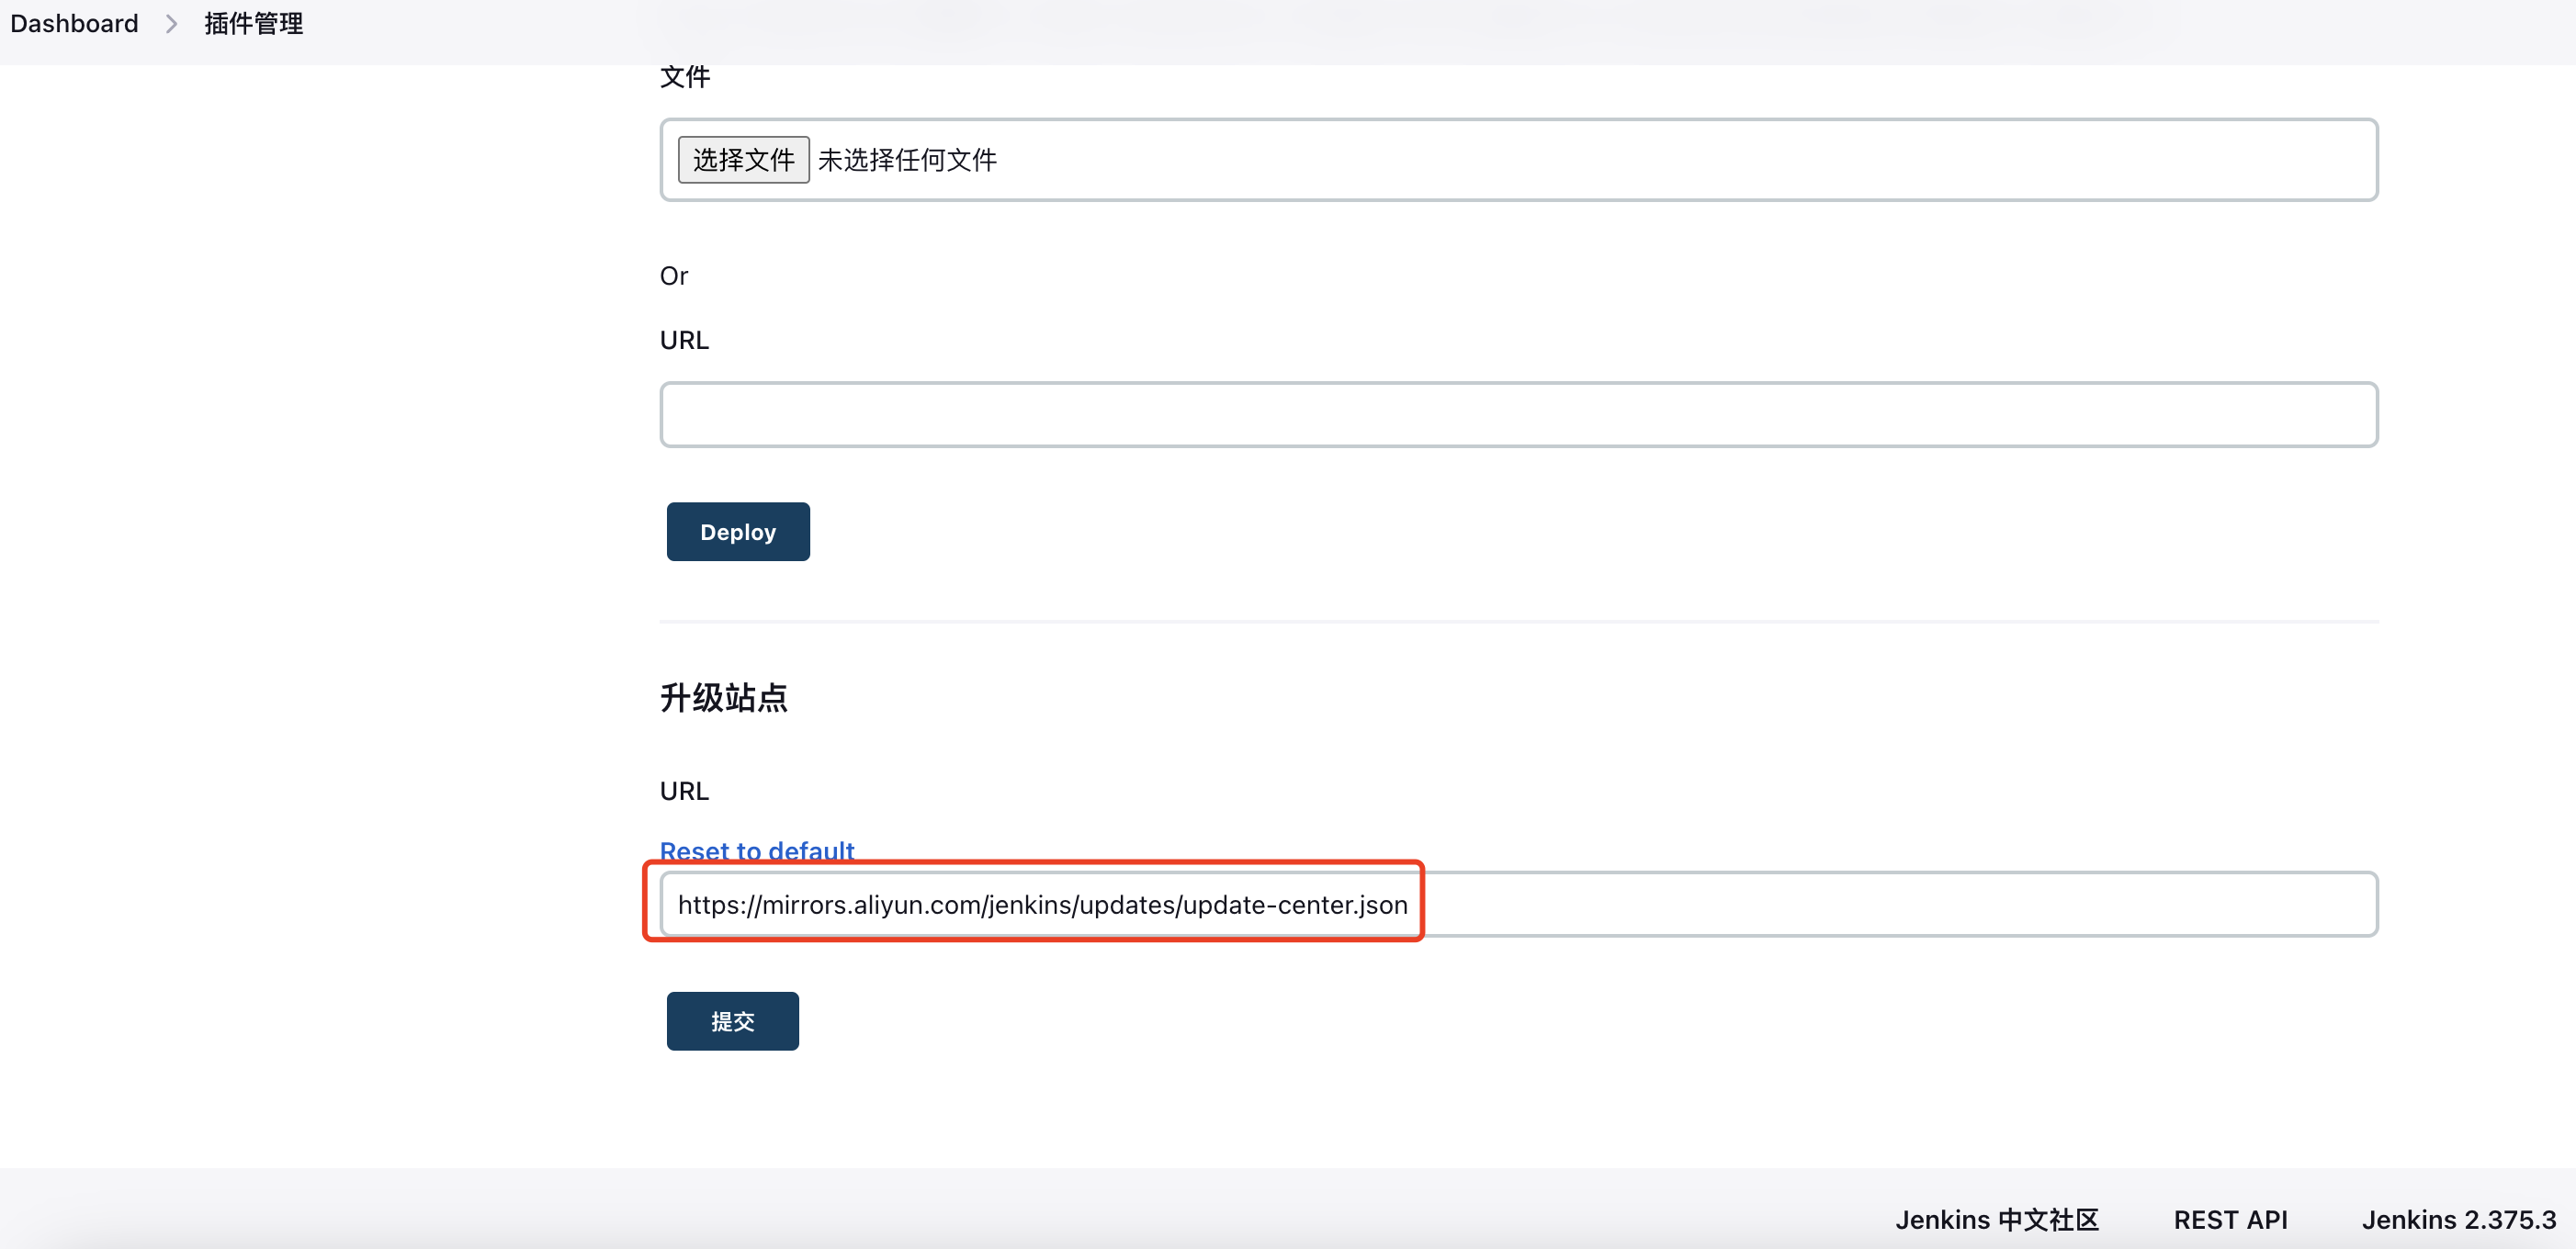
Go to: https://jenkins.test.com/chinese/ and configure the domestic mirror source. I use Alibaba Cloud’s mirror: https://mirrors.aliyun.com/jenkins/updates/update-center.json
3. Install Plugins
Visit: https://jenkins.test.com/manage/pluginManager/available
I mainly install the following plugins: Kubernetes, Chinese language pack, Pipeline, etc. Specific steps are omitted here.
- Jenkins Localization (Chinese): https://plugins.jenkins.io/localization-zh-cn/
- Build With Parameters: https://plugins.jenkins.io/build-with-parameters
- Kubernetes: https://plugins.jenkins.io/kubernetes/
- Pipeline: https://plugins.jenkins.io/workflow-aggregator/
- Git: https://plugins.jenkins.io/git/
- zentimestamp: https://plugins.jenkins.io/zentimestamp/
2. Connect to Kubernetes Cluster
1. Configure Kubernetes Cluster Info
Go to: https://jenkins.test.com/configureClouds/
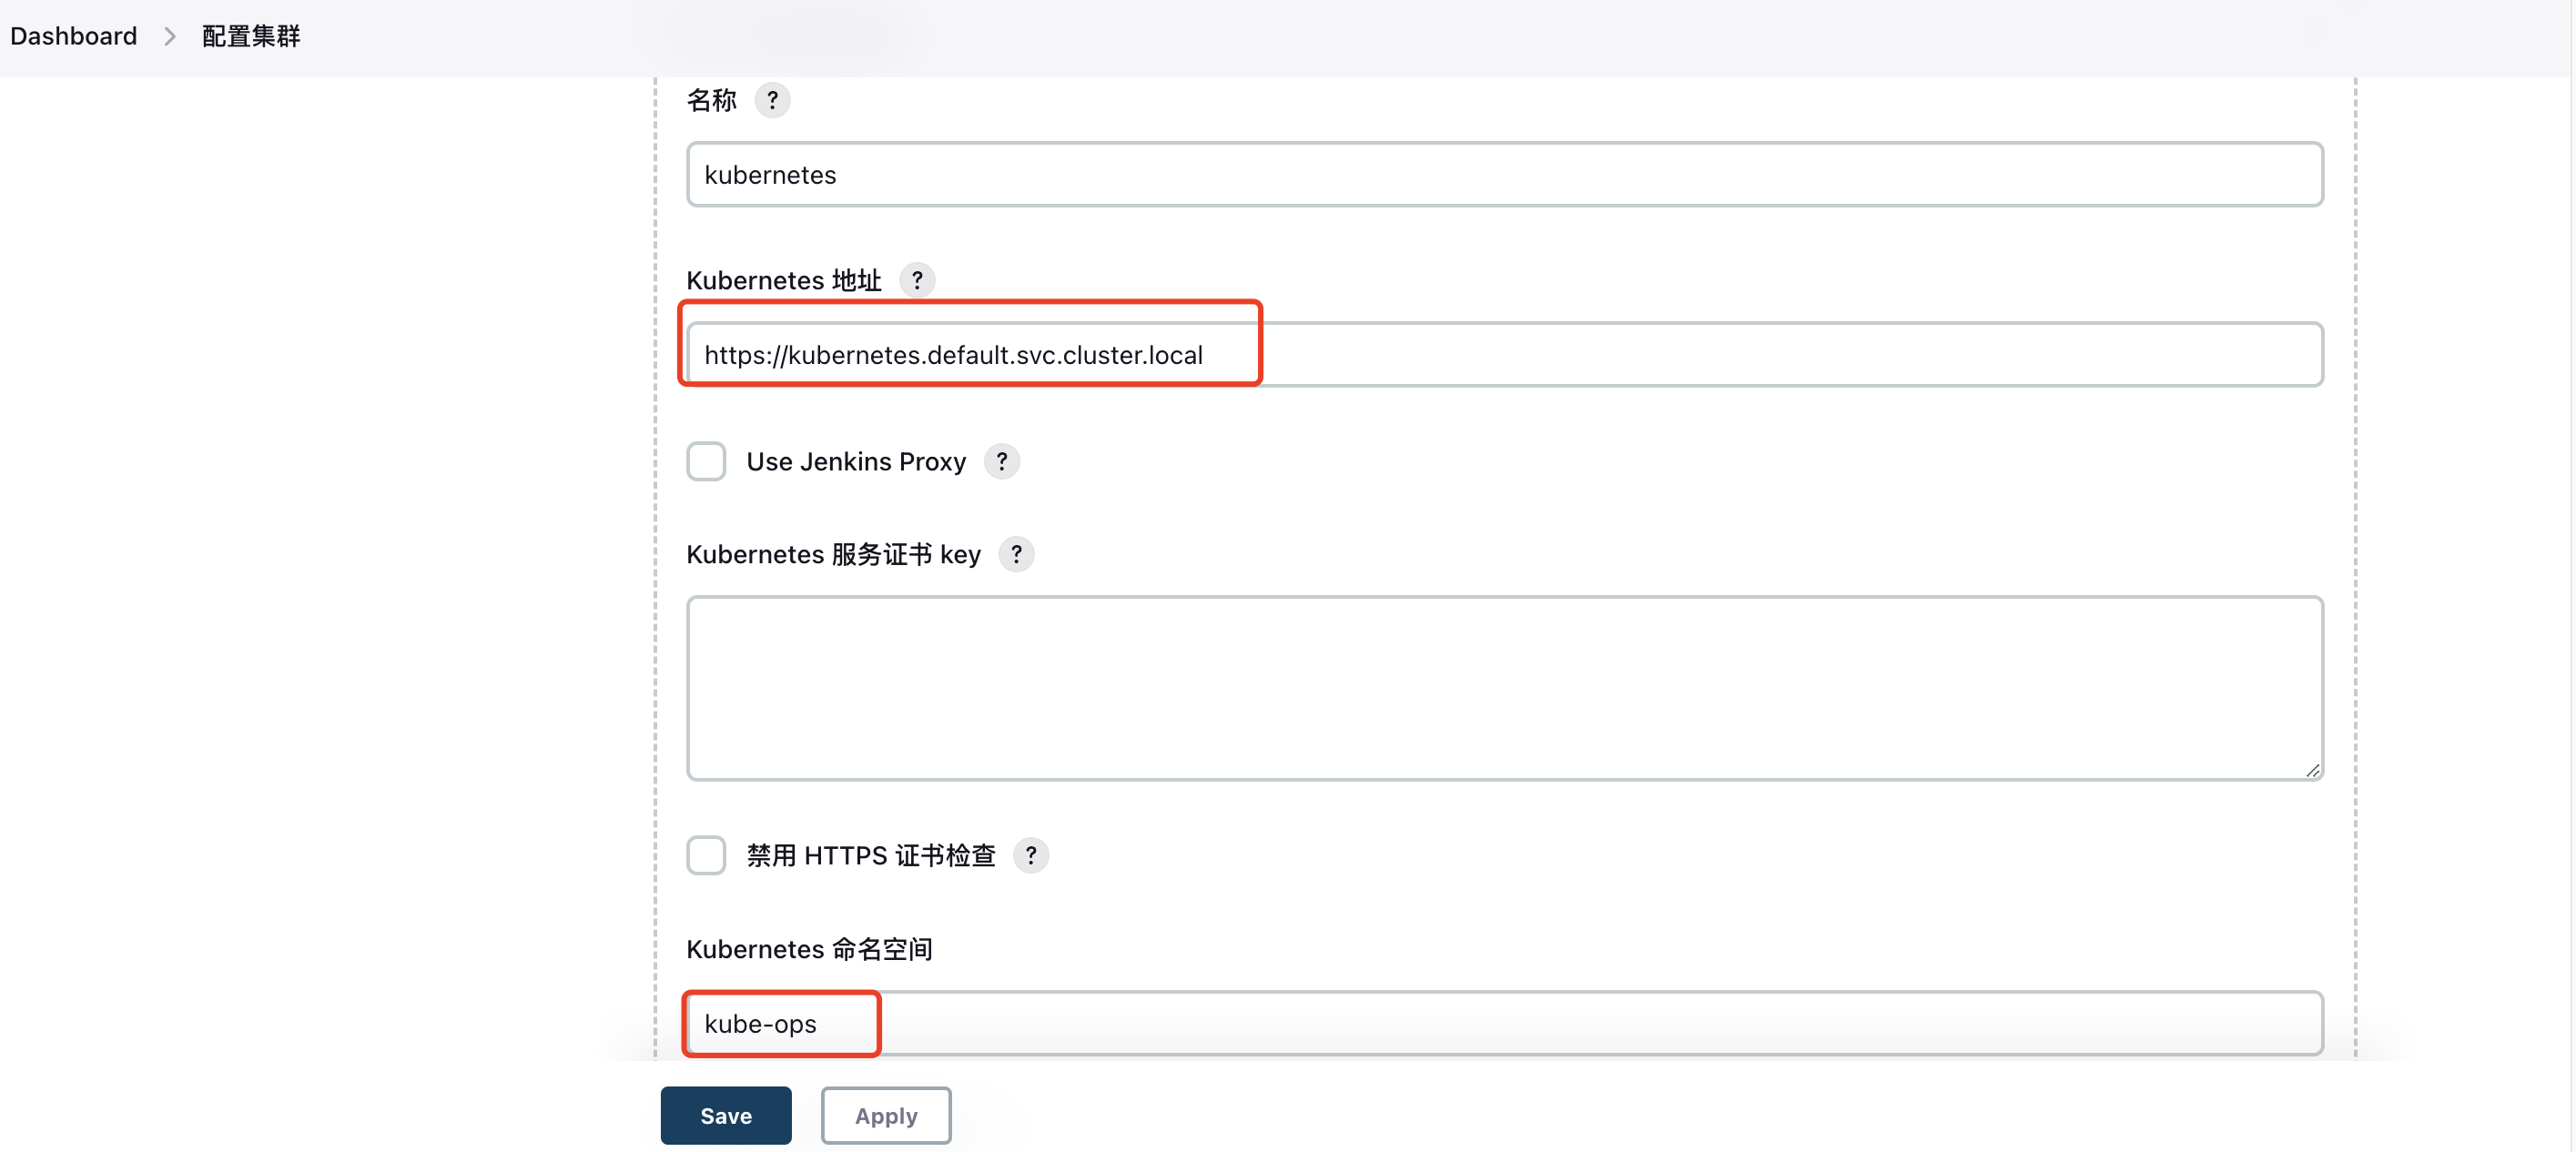
Create a new cloud, select Kubernetes, and configure the cluster address and namespace:
2. Configure Jenkins Access Address
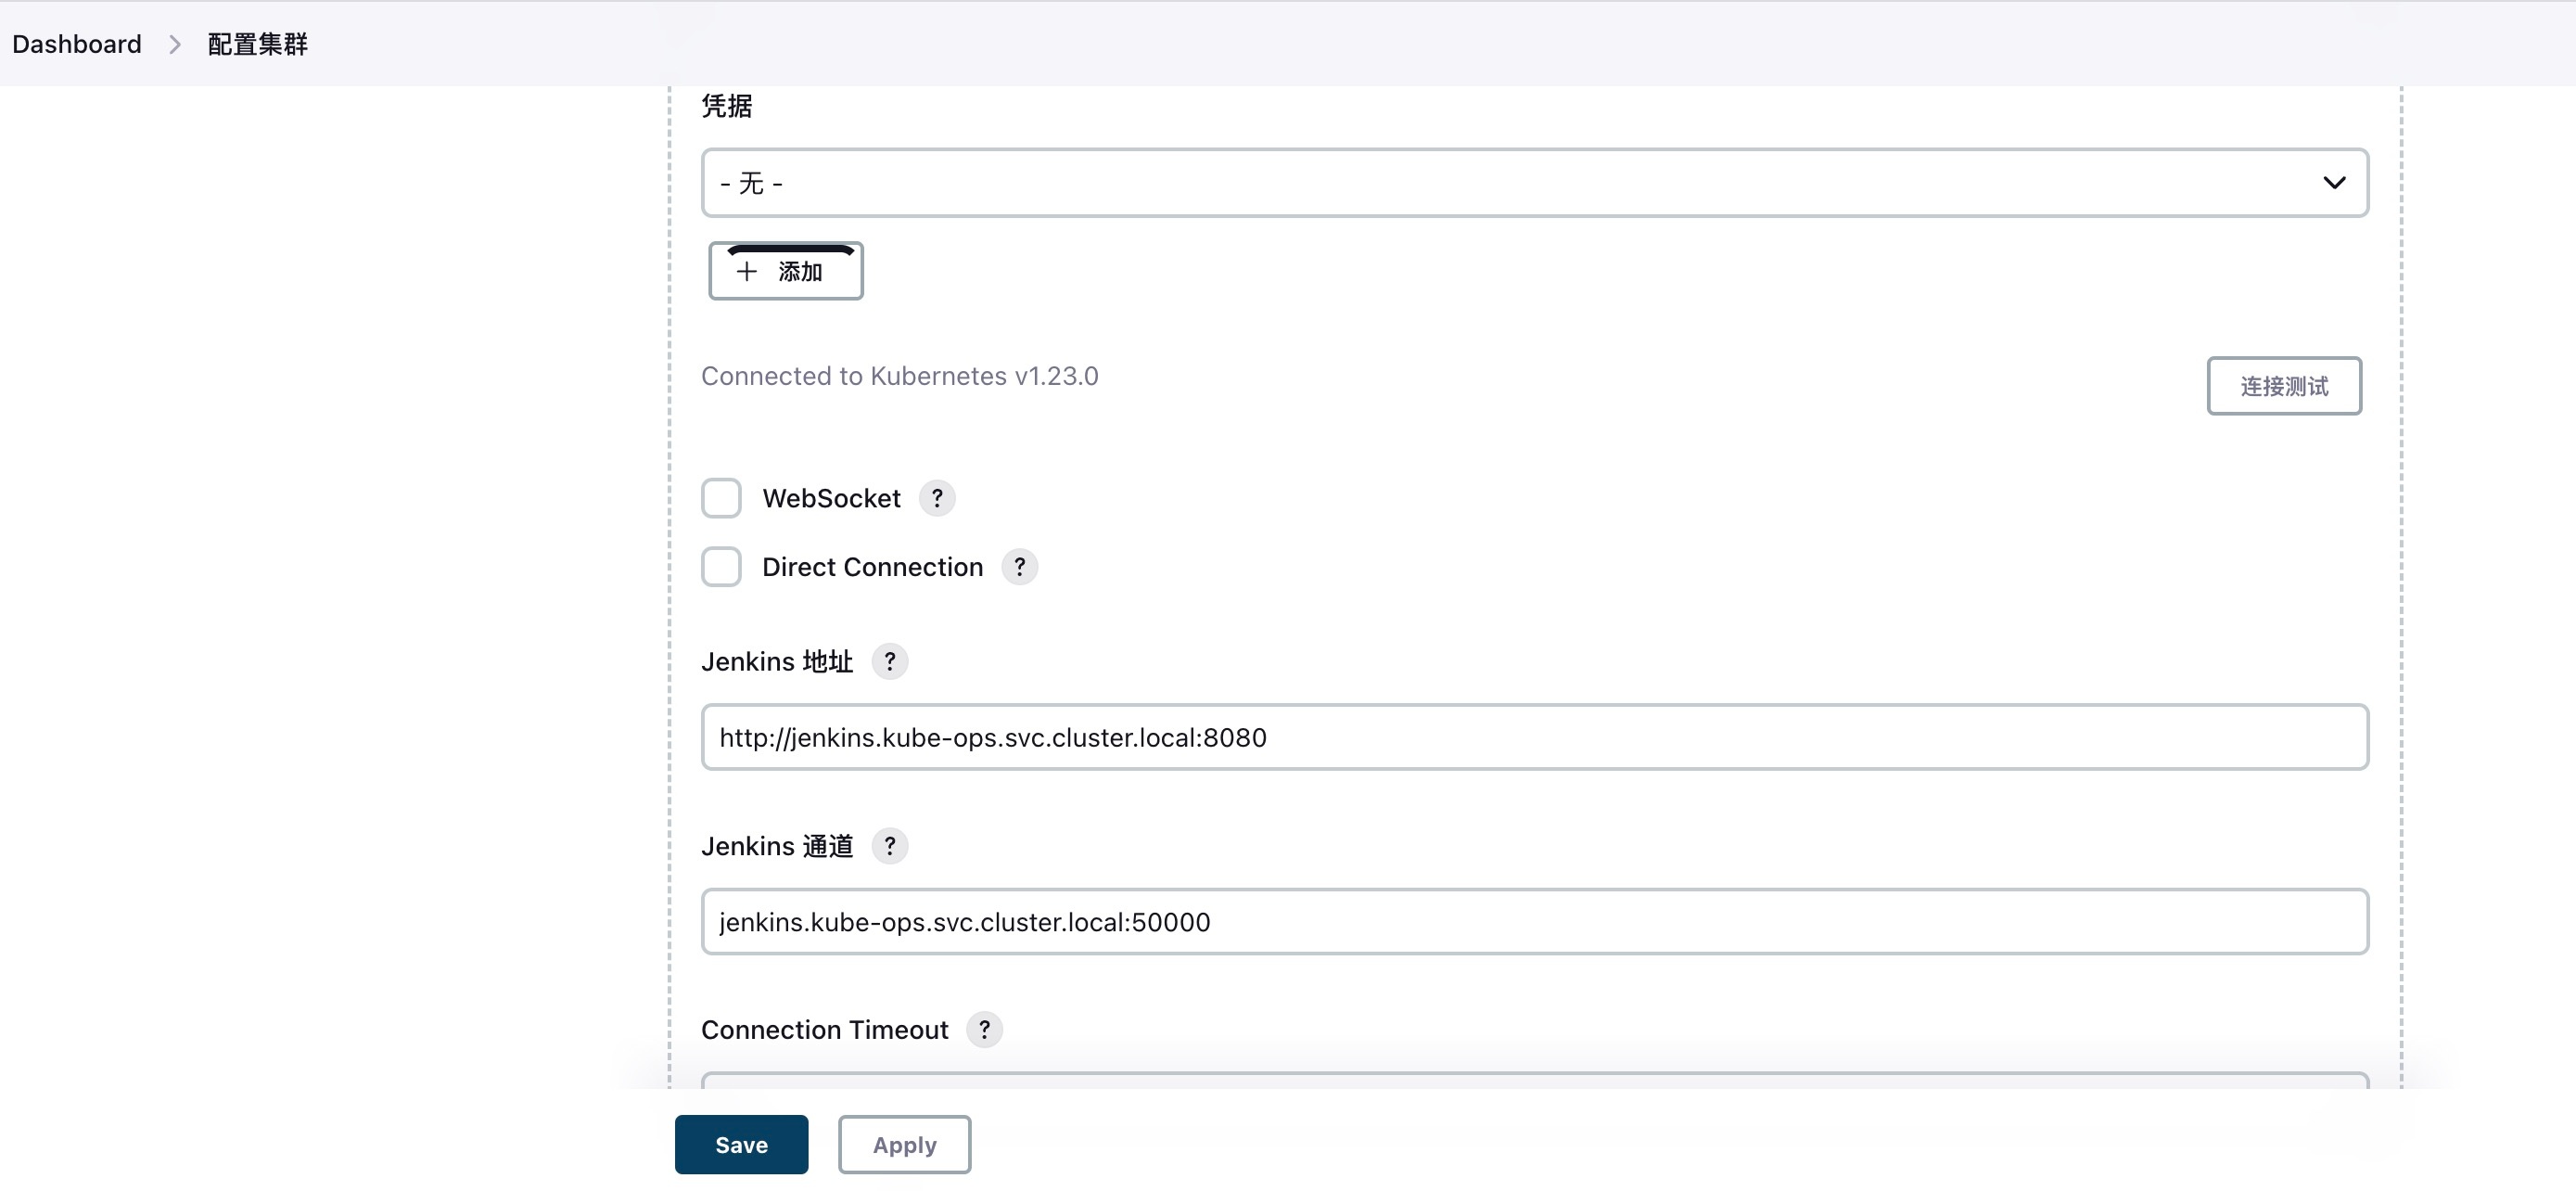
Set the Jenkins URL used within the Kubernetes cluster, including the Jenkins agent channel address:
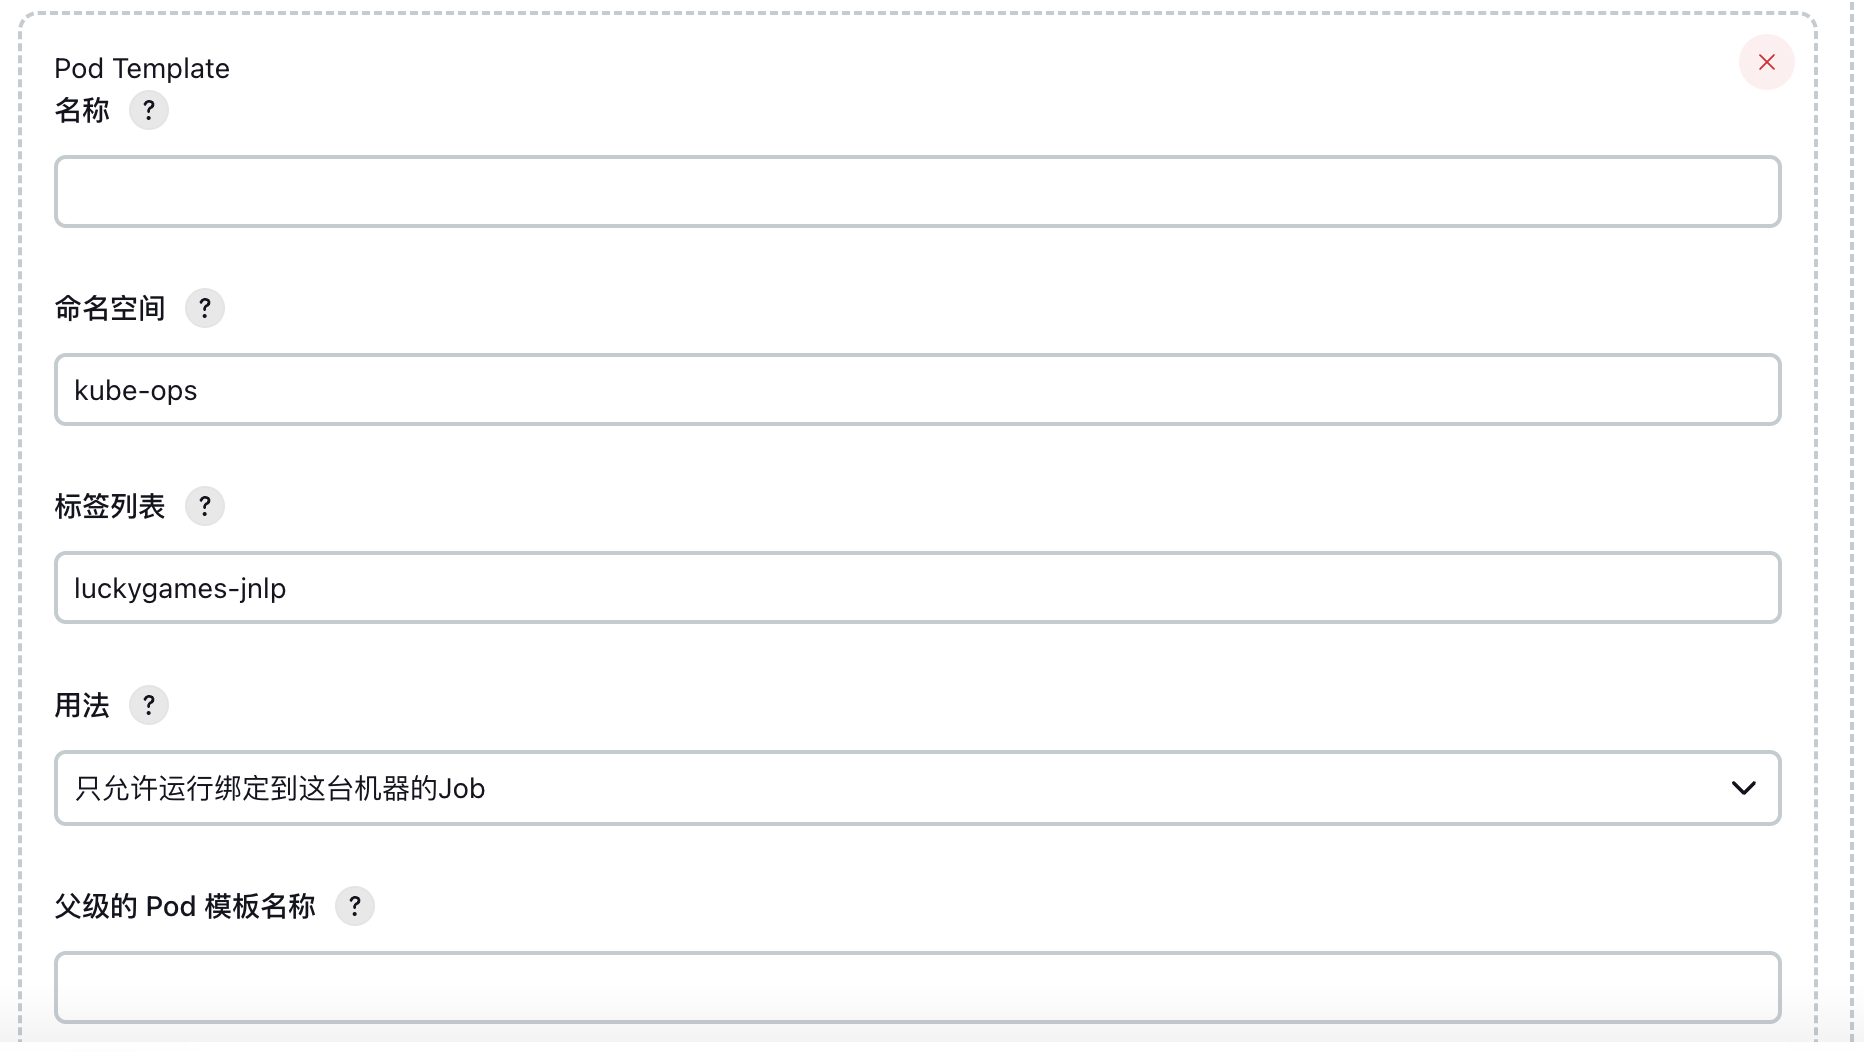
3. Pod Template Configuration
Configure namespace and labels:
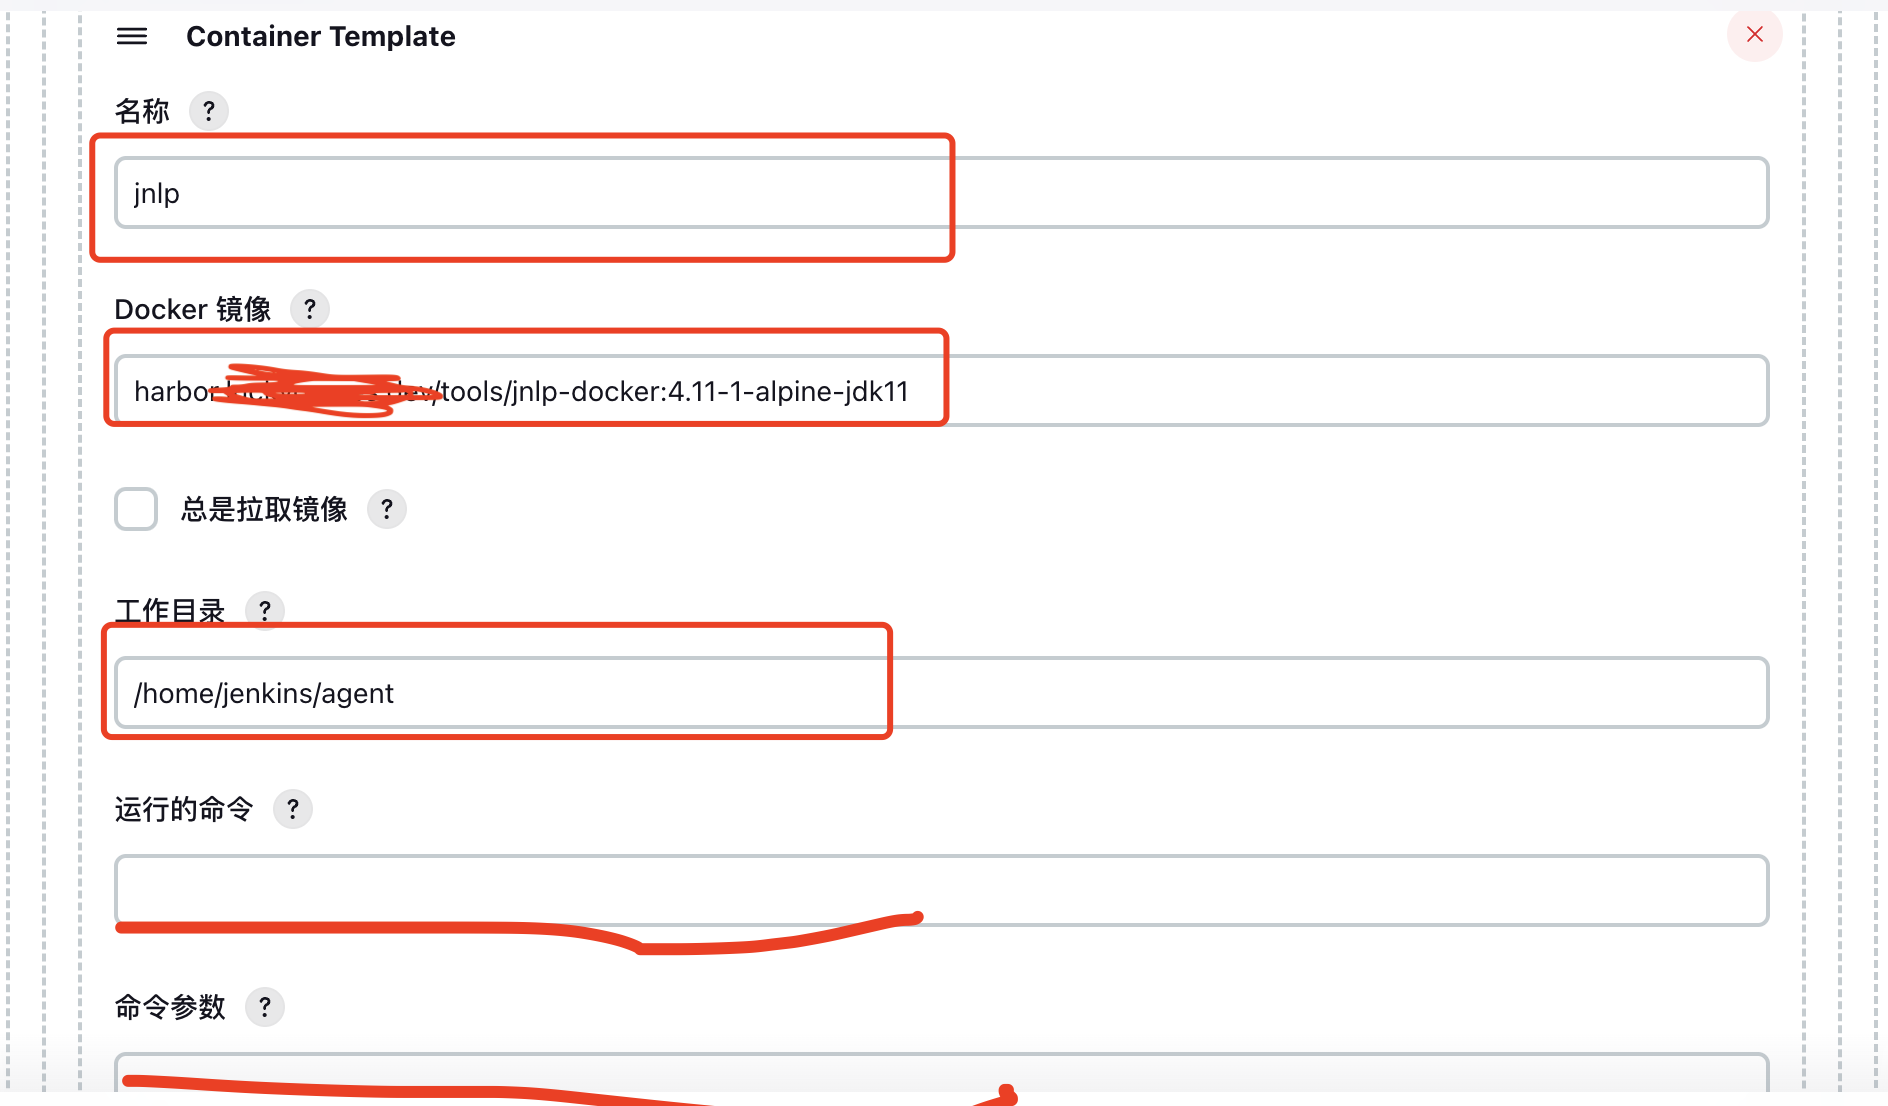
4. Container Template Configuration
Define slave build container settings. Note that the container name must be jnlp.
The Docker image I use is self-built, pre-integrated with docker, kubectl, and other tools. Leave the Command and Arguments fields blank; otherwise, container creation will fail.
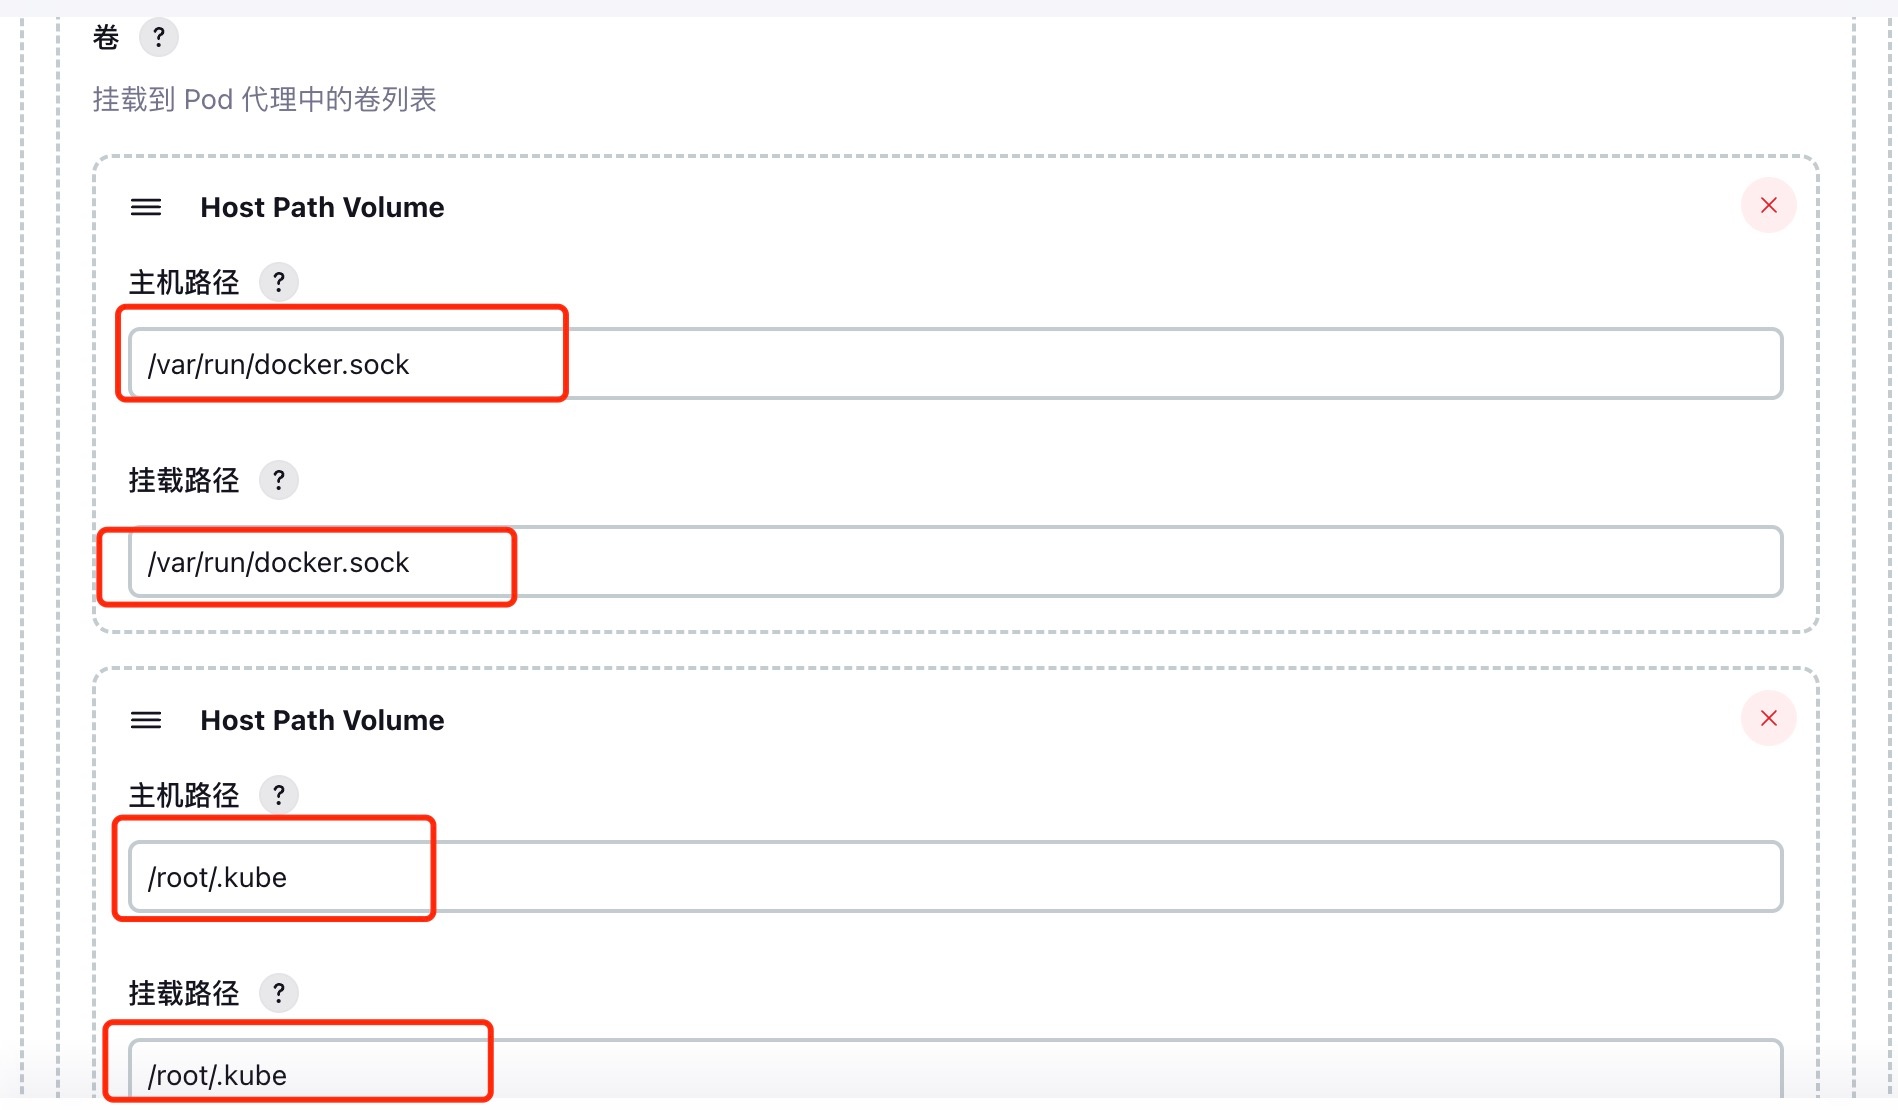
Configure volumes:
- Mount Docker socket to enable Docker-in-Docker (sharing host Docker).
- Mount
kubeconfigto allowkubectl,helm, and other commands to manage Kubernetes resources.
Finally, set the Service Account to jenkins, which matches the account created earlier.
3. Simple Test
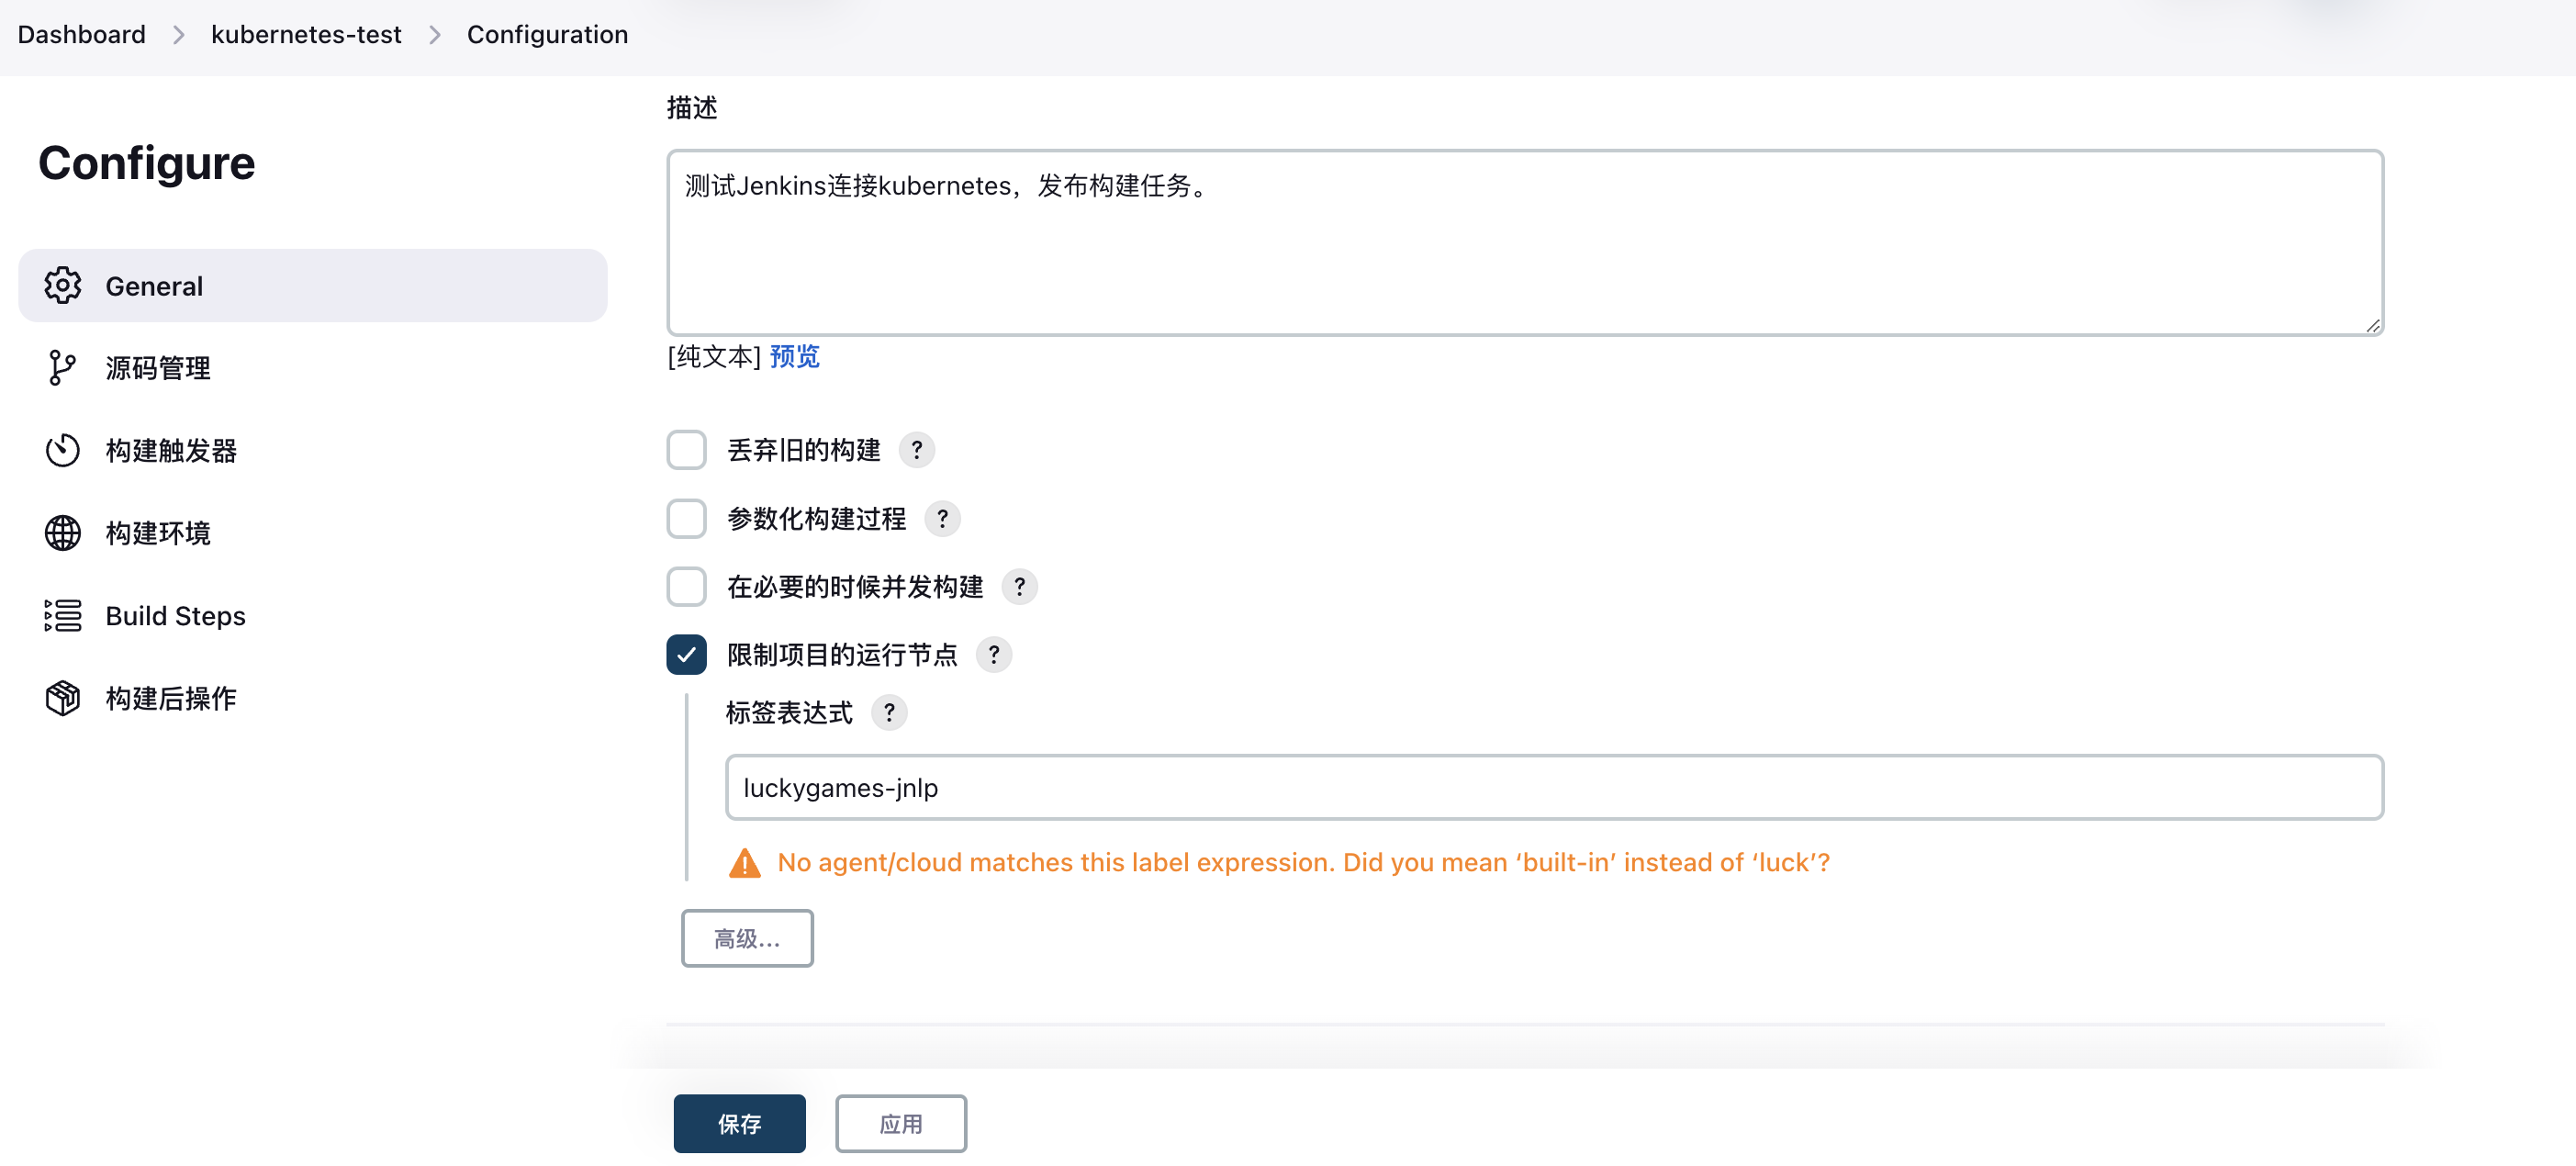
1. Create a Freestyle Job

2. Bind Slave Pod
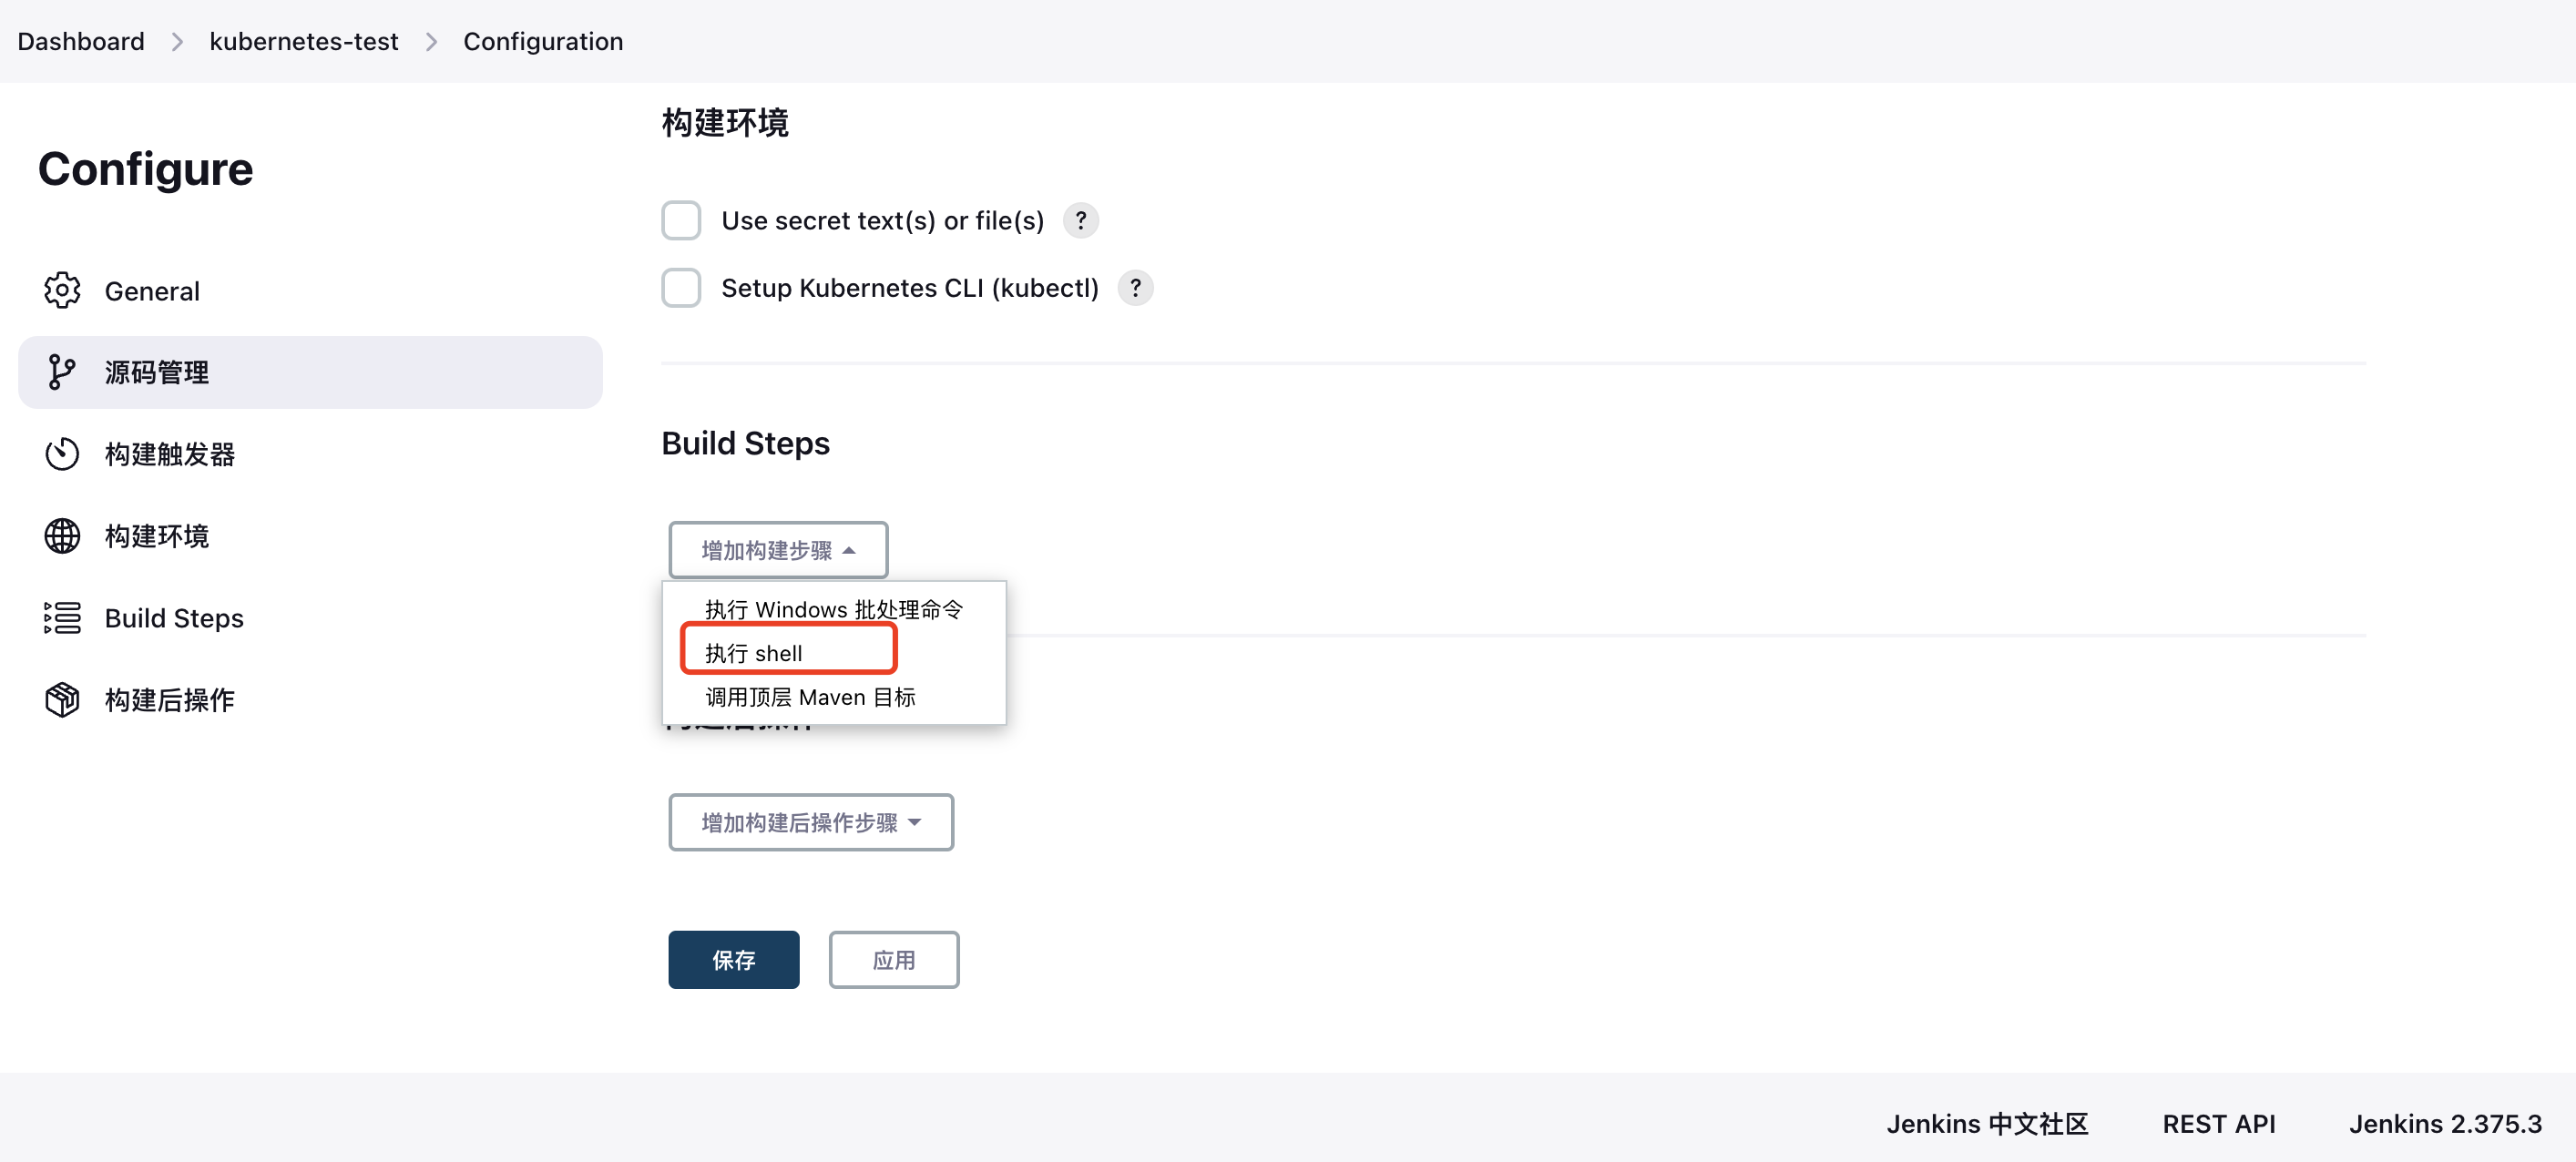
3. Configure Shell Test Command
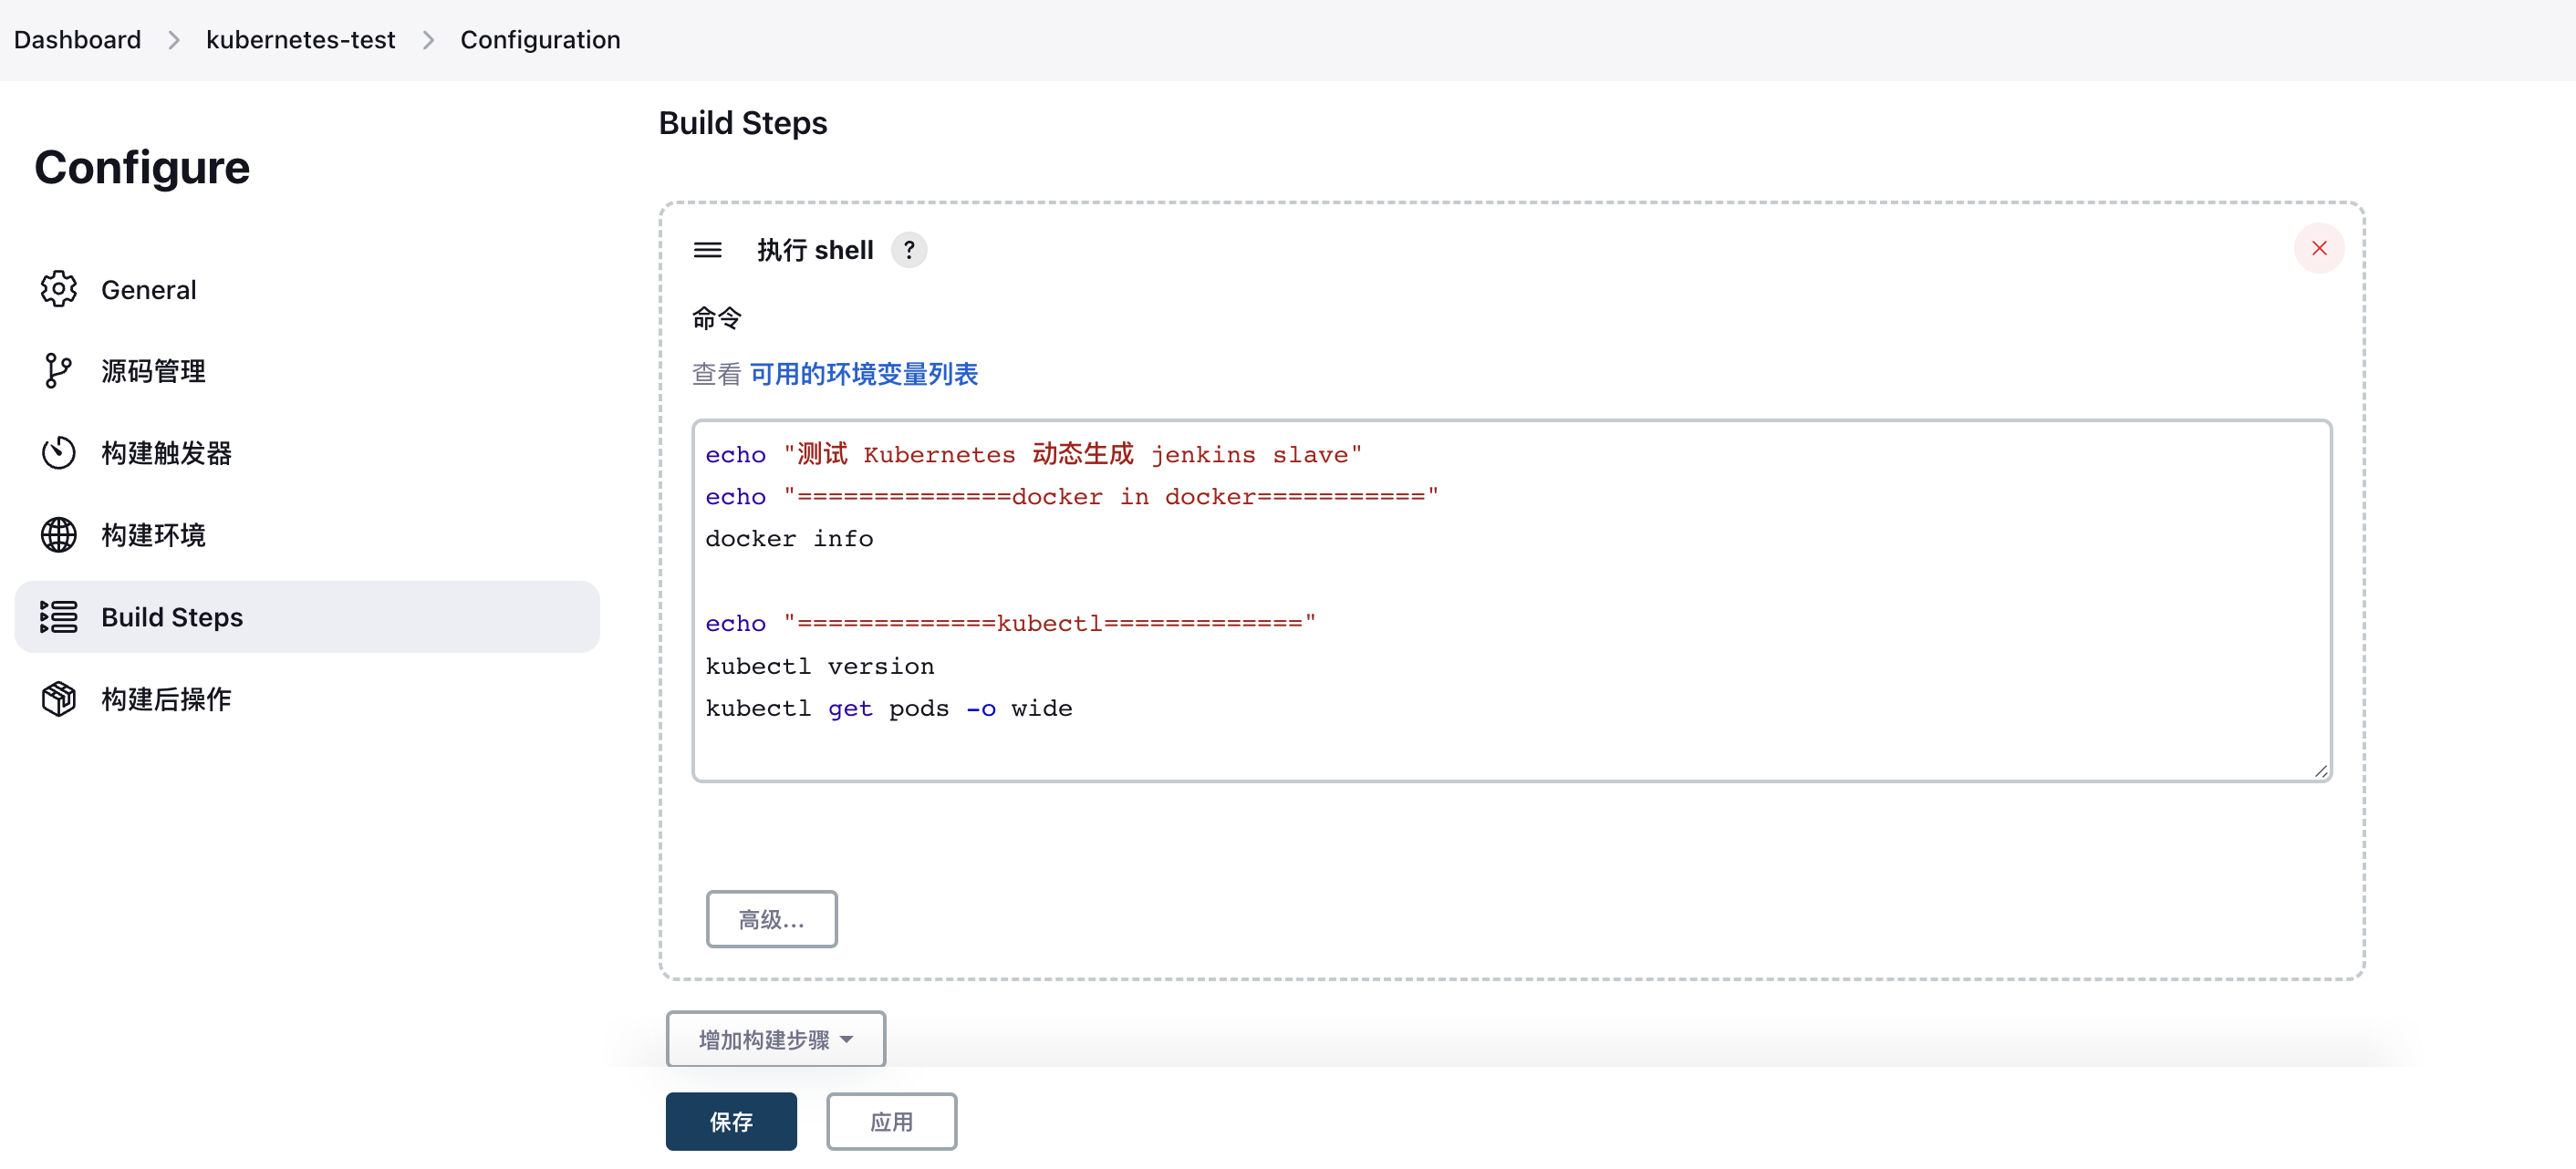
4. Execute a Build Task
After execution, check the build history. You’ll observe that a slave Pod is automatically created during the process and then automatically deleted after completion.

4. Summary
Continuous integration and delivery (CI/CD) are essential components of modern development workflows. Most companies currently deploy Jenkins clusters to build CI/CD environments. However, traditional Jenkins Slave architectures (one master, multiple slaves) face several challenges:
- Single point of failure: If the Master fails, the entire pipeline becomes unavailable.
- Inconsistent slave configurations: Different languages require different build environments, leading to complex and hard-to-manage configurations.
- Uneven resource distribution: Some Slaves are overloaded while others remain idle, causing job queuing.
- Resource waste: Slaves often run on physical or virtual machines, consuming resources even when idle.
These issues drive the need for a more efficient and reliable solution. Containerization technologies like Docker, especially when combined with Kubernetes, effectively address these pain points. Below is a simplified diagram of a Jenkins cluster built on Kubernetes:
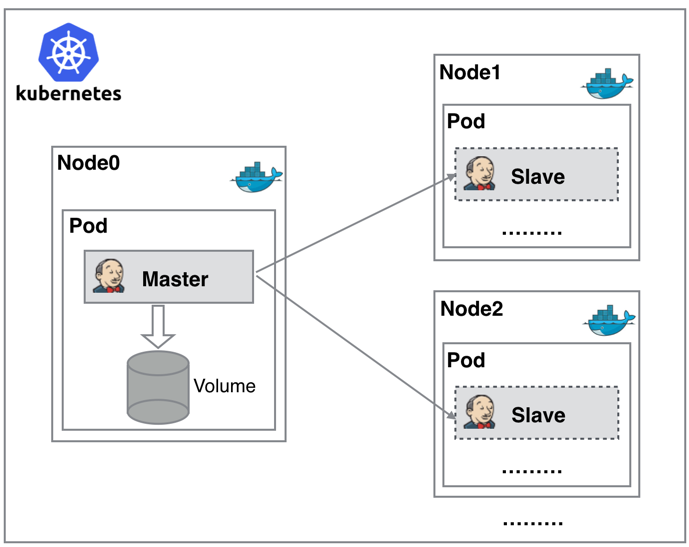
As shown in the diagram, both Jenkins Master and Slave run as Pods on Kubernetes nodes. The Master runs on one node and stores its configuration data in a Volume. Slaves are dynamically created and destroyed based on demand, rather than running continuously.
The workflow is as follows: When the Jenkins Master receives a build request, it dynamically creates a Jenkins Slave Pod based on the configured label, registers it with the Master, executes the job, then deregisters and deletes the Pod upon completion—returning to the original state.
Benefits of this approach include:
- High availability: If the Jenkins Master fails, Kubernetes automatically creates a new container and assigns the Volume, preserving data and ensuring service continuity.
- Dynamic scaling: Resources are allocated only when needed. After each job completes, the slave is deregistered and the Pod is deleted, freeing up resources. Kubernetes intelligently schedules slaves onto idle nodes, reducing bottlenecks caused by high utilization on specific nodes.
- Excellent scalability: When cluster resources become insufficient and jobs queue up, simply add a new Kubernetes Node to scale horizontally.
Are all the previous problems solved in a Kubernetes environment? It appears nearly perfect.
Ultimately, deploying CI/CD using Jenkins + Kubernetes offers clear advantages in both workflow efficiency and cost optimization.